- Downloaded
- 510.5 GB
- Uploaded
- 24.5 TB
- Ratio
- 49.16
- Seedbonus
- 27,763
- Upload Count
- 1 (1)
Member for 7 years
A small guide to have higher protection for our valuable files without extra software.

My idea is, to provide some simple solutions to everyday problems that us PC users might face. In some cases I will try to avoid using external software as in several cases it may not be possible to download and/or use and so my solutions are mostly relying on windows itself. It's a common misunderstanding that windows are not powerful enough (or secure) and actually, Windows can be used in several cases in the place of other types of software, for example as a file server, virtual host, Encryption, etc, something that we will see in the future.

Windows don't have a straight forward way of protecting files or folders with a password but we can use a simple "trick" to create such a function. What we will do is create an encrypted and password-protected area that we can store our files and info that we want to keep private and additionally, it offers mobility as we can use that private storage in other PCs too, without the risk of exposing our info after we leave. At the same time, it does provide some level of protection from Ransomware and malware since they can't access the area unless its first was unlocked by you, using your password, assuming that you follow the steps below. Needless to say, this (and any) solution is as good as the way we use it. Use it right and it will be a very good additional line of security and protection for you.

As I said above, windows don't offer a way of protecting files/folders with a password. The main reason is that that the account itself is normally protected from unauthorized access. I'm sure tho there will be cases that people will feel more secure if they could password-protect their personal photos and documents from 3rd eyes or even malicious software. In windows, we can do that by using a combo of a Virtual Hard disk and Bitlocker and all without the need for third-party tools or complicated scripts, which are probably not as secure as using the Windows 10 built-in encryption feature. Please keep in mind that my screenshots might be a bit different than yours as in my test bench PC I use windows 10 LTSB (2016) and some things might be different.

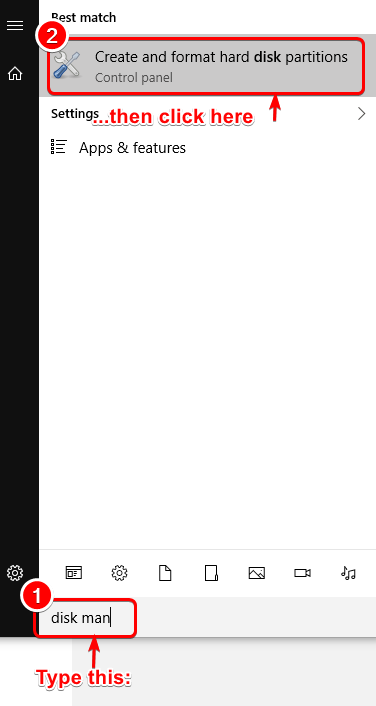
1. Open Start.
2. Search for Disk Management and click the top result to open the app.
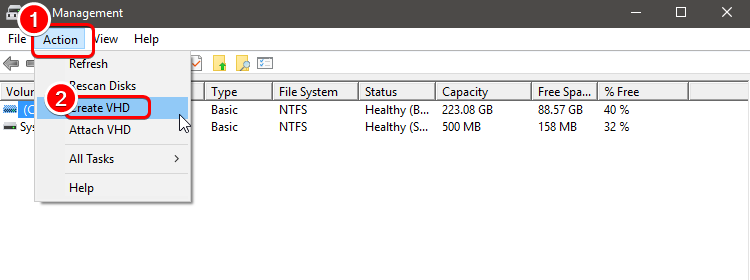
When Disk Management is open,
1. Click the Action menu.
2. Click the Create VHD option.
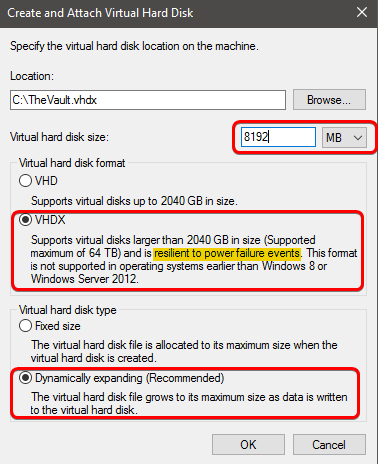
- Click the Browse button to select a location to store the virtual disk.
- Specify a name for the drive you like, for example, TheVault.
- Click the Save button.
- Under the "Virtual hard disk size" section, specify the amount of space that you want to reserve for storage, for example, 8GB, but you can use any amount based on the content that you want to protect.
Now some explanation about the options here. Under the "Virtual hard disk format" section, we have 2 options.
1. VHD which is best in case you want to use your protected disk on older PCs and also with 32 bit systems (win 7 etc)
2. VHDX which can only be used with 64 bit systems and offers greater potential capacity but more important,
its resilient to power failures and random shutdowns which helps a lot with securing your valuable files.
My recommendation is for VHDX but it's up to your specific needs.
Select the Dynamically expanding option so the storage will only grow as you save files.
Click the OK button.
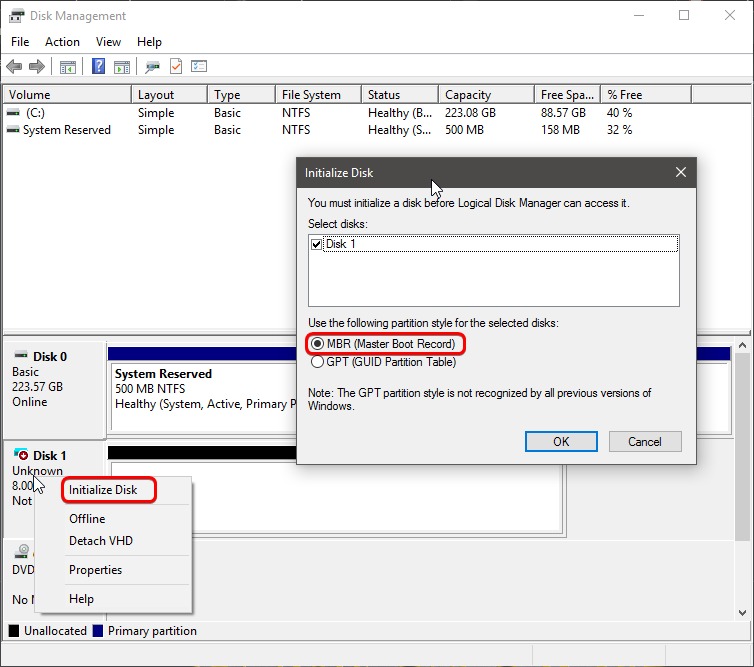
After that, you will see a new disk in Disk management and so we need to initialize and format it. Right-click on the new Disk called unknown (the number may be different for you as it depends on the number of disks you already have), select Initialize Disk and then from the PopUp window, select the right Disk and choose MBR. Select GPT ONLY if you plan to make a greater than 2TB locked Disk (which I doubt). Click OK.
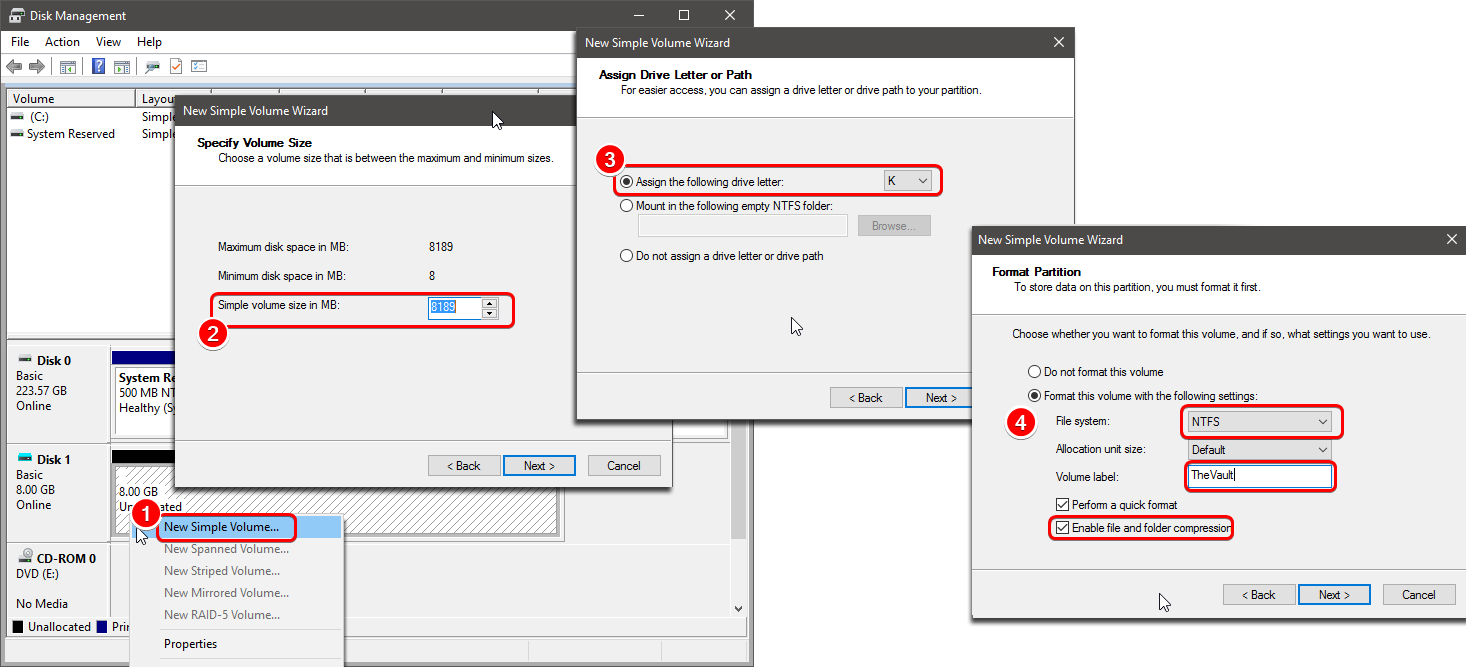
Right-click the "Unallocated space," and select the New Simple Volume option.
Click the Next button.
Use the default settings for the volume size.
Click the Next button.
Use the "Assign the following drive letter" drop-down menu to select a letter for the new drive.
Click the Next button.
Use the "File system" drop-down menu, and select the NTFS option.
Use the "Allocation unit size" drop-down menu, and select the Default option.
In the "Value label" field, type a descriptive name for the drive. For example, TheVault.
Check the Perform a quick format option.
The option about file compression is up to you and what kind of files you plan to store. Document files spreadsheets and databases as well as pdf etc, tend to compress nicely but JPG and MP3s don't. In general, I would have it enabled, but it's your decision.
Click the Next button.
Click the Finish button.
Once you complete the steps, you'll end up with a virtual hard disk that you can soon use as a password-protected drive by using BitLocker.

To set up BitLocker on a virtual hard disk on Windows 10, follow these steps:
Open Control Panel.
Click on System and Security.
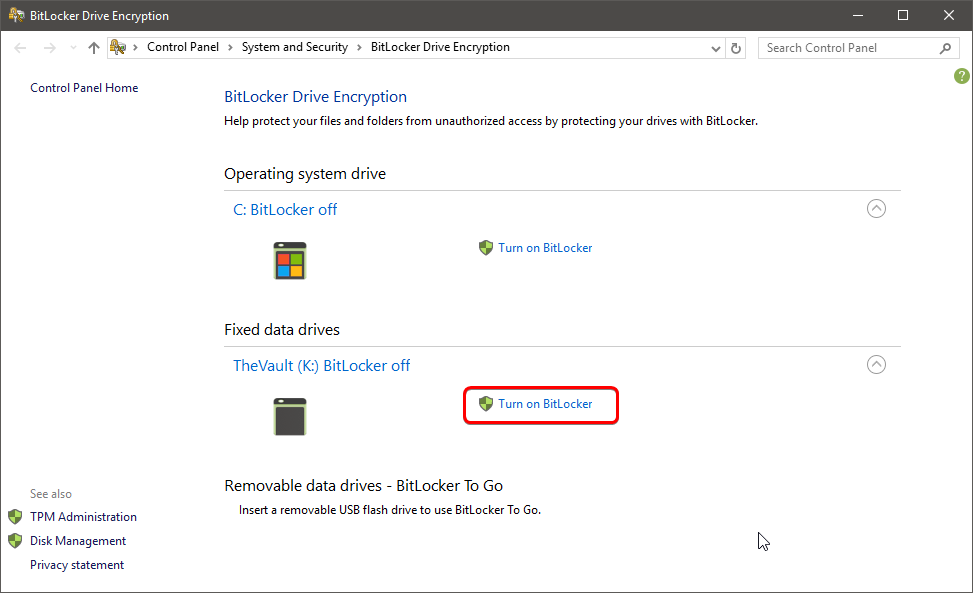
Click on BitLocker Drive Encryption.
(Alternatively, press start and search for Bitlocker and then click on the Icon)
Under the "Fixed data drives" section, select the TheVault drive.
Click the Turn on BitLocker option.
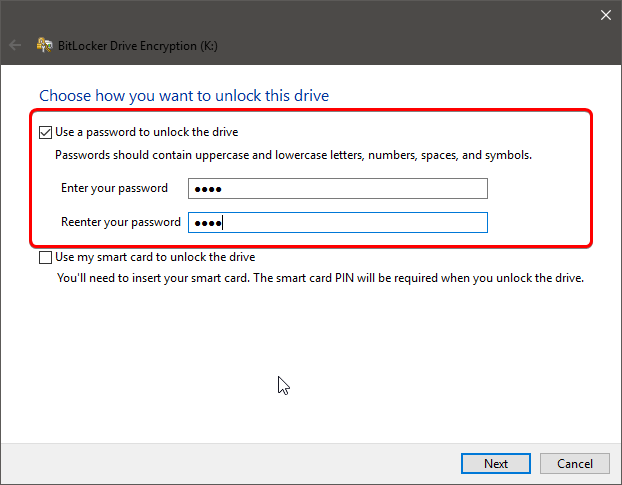
Check the Use a password to unlock the drive option.
Create a password to protect your folders inside the drive (don't use 123456
 ).
).Click the Next button.
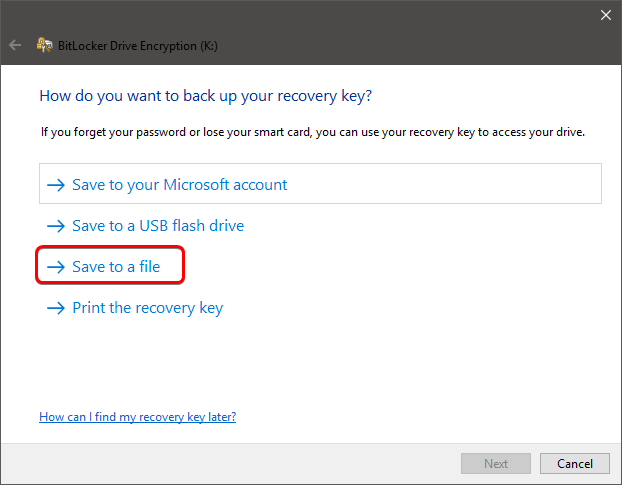
Click the Save to a file button.
Select a location to store the recovery key.
IMPORTANT: If you forget the password or lose the recovery key, you won't be able to recover your files, so make sure to keep this file in a secure place.
Click the Save button.
Click the Next button.
Select the Encrypt used disk space only option.
Click the Next button.
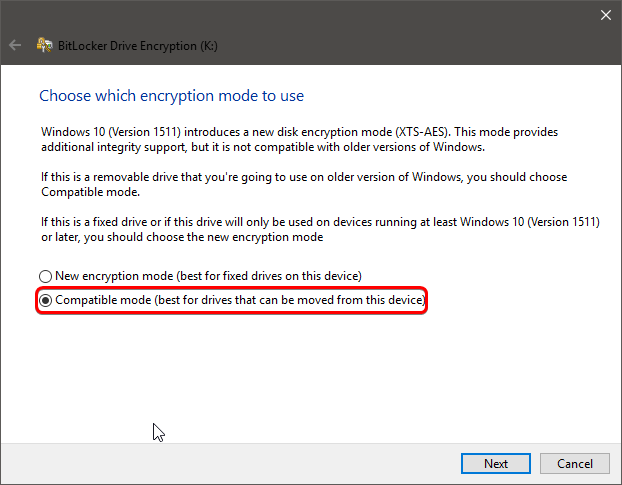
Select the Compatibility mode option if you plan to use the VHD on other, older PCs, or the New Encryption mode if the drive will be used on, up to date Windows 10 PCs, or your PC only.
Click the Next button.
Click the Start encryption button.
If everything goes well you should see this :
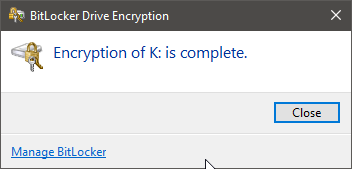
Click the Close button once the encryption has finished.

Once you created a virtual drive and configured BitLocker, you'll need to know a few steps to lock and unlock your files and folders.
Locate the VHD (or VHDX) file we just created and right-click and select Mount. Then you will see it, with a Gold Locker Icon (BitLocker) and the leter we chose on the steps above
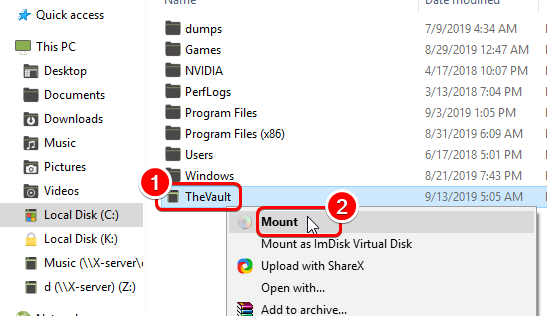
After that, select the drive and you will be prompted to give the password
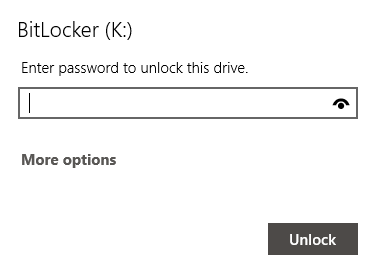
Once we give the right password we can use it as a normal drive to view, update, copy and manage our files anyway we want. Alternatively, you can also create a shortcut of the VHD file to your desktop for easier mounting.
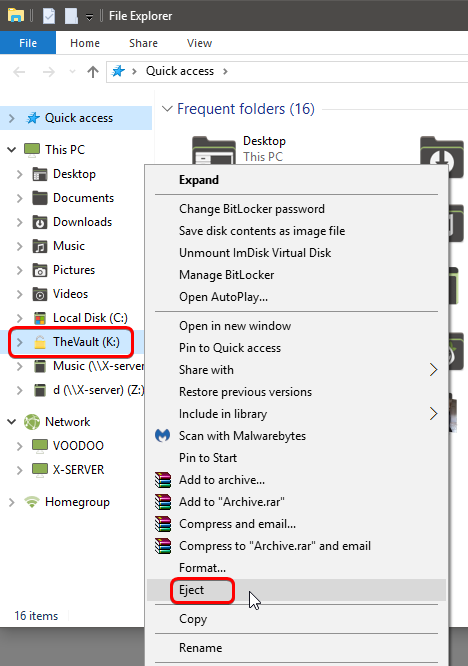
Once done, right click on the drive and select Eject. The drive will be removed from the drive list (dismounted) and will be inaccessible to any person or program till such time you reopen it with your password. Files will stay protected and away from other peoples eyes.

Personally I use this way a lot for 2 reasons.
1. It allows me to have a secure location for files that must be protected both from other people and malicious software. Bitlocker encryption if implemented well is virtually unbreakable (so far) when it comes to VHDs cause there is no other vector to approach like cracking the hibernation files or reading Ram (google for more info). Even if one chooses to use brute force, the algorithm is so slow that even with a GPU (assuming you are using a good password) will take ages.
2. It allows me to store the Virtual Drive (VHD) to an external USB stick (or disk) and use it at other PCs (mount, copy files, dismount) and so I can work on remote locations.
With some imagination, this "trick" can be used in several other cases. My favorite one is to have the drive shared over the network but only my team has the password and so they can mount/unmount from any location on the network and get or update the files they need. No other person has access unless they have the password. If you need to send files securely, make a small vhd (minimum size is 8mb) and add the files you want, apply BitLocker and send that vhd. The benefit is that the drive once mounted can keep its original folder/file structure and the recipient, won't have to decompress and recompress, just click and mount, unlock, update, dismount and send back.
I understand that mounting and ejecting the VHD can be bothersome somehow (remember you can also create a shortcut for easier access) but the benefits of one of the best protections I think it's worth it.
Feel free to share your thoughts and I hope you find it useful.
--------------------------------------------------------------------------------------
Other Guide
You must be registered for see links
Last edited:
")


