- Downloaded
- 5.7 GB
- Uploaded
- 448.6 GB
- Ratio
- 78.11
- Seedbonus
- 134,973
- Upload Count
- 217 (223)
Member for 5 years
FIX: ‘The Parameter Is Incorrect’, Services Error 87 In Windows 10


As we all know, background services drives many Windows features. So it is important that these services should work properly so that dependent features also work as expected.
Recently, while modifying a Windows service status, we received following error:
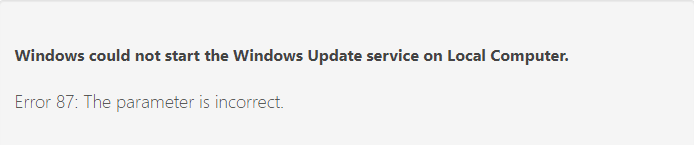
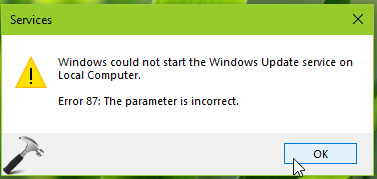
Above error is shown for Windows Update service but you may receive it with any service. If you’re also facing this issue on your system, please refer below mentioned suggestions and see if they helps you to fix.
FIX 1 – General Suggestions
1. Reboot the machine and see if issue still persists.
2. Perform clean boot.
3. Try the System File Checker (SFC) scan.
4. If SFC scan fails to fix your system, try the DISM tool and see if that helps.
5. If possible, try to restore your system back to date when this issue wasn’t present.
2A. How To Perform Clean Boot In Windows 10/8.1/8/7
1. Press
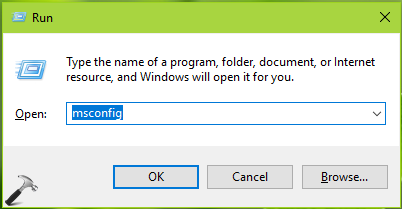
 + R and put msconfig in Run dialog box to open System Configuration Utility. Click OK.
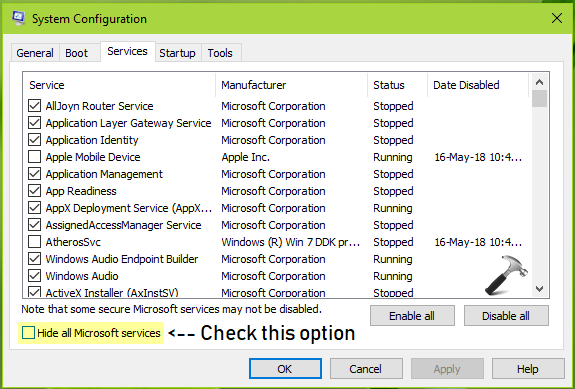
2. In the System Configuration window, switch to Services tab and check Hide all Microsoft services option. Then click on Disable all.
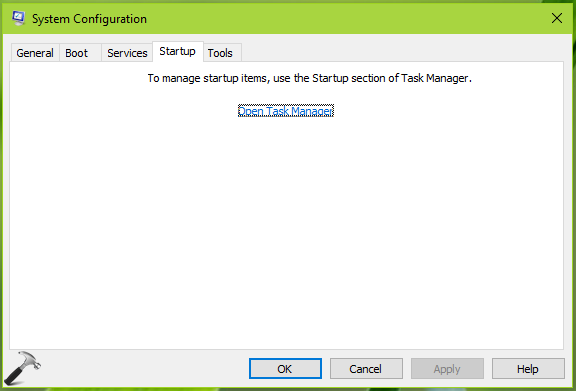
3. Now switch to Startup tab and click Open Task Manager link.
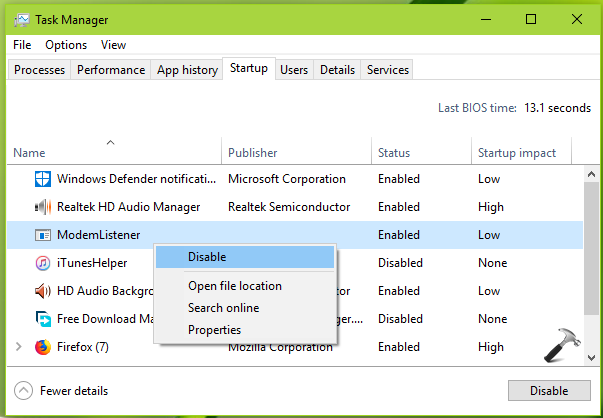
4. In Task Manager window, on Startup tab, right click a suspected third-party program entry and click Disable.
5. Close Task Manager and reboot the machine.
6. If after reboot, you don’t face the issue, we’ve identified the root cause for your problem, and it is the software for which we disabled service in step 4. You must uninstall the associated software to prevent it from causing trouble on your system.
7. If the issue still persists, enable the software service you disabled in step 4. Pick another service, disable it and reboot, see if the issue is resolved. You can perform this sequence until you identify the actual program causing issue.
3A. How To Use System File Checker To Repair Windows 10/8/7
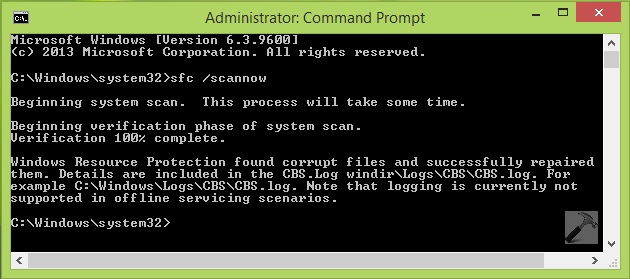
1. To use SFC /SCANNOW command, you have to open administrative or elevated Command Prompt with administrative privileges. In the Windows search box, type cmd and pick Command Prompt from results, right click it and select Run as administrator.

2. Then simply type SFC /SCANNOW or sfc /scannow command (it’s not case-sensitive) and hit Enter key.
4A. How To Repair Windows 10 Using DISM Command-line Tool
1. Right click Start Button or press
+ X keys and select Windows PowerShell (Admin).
2. First we’ll check if the component store is repairable. This step is optional and if you like, you can skip it and directly go to step 3. So to check component store corruption, type/paste following in administrative Windows PowerShell window and press Enter key:
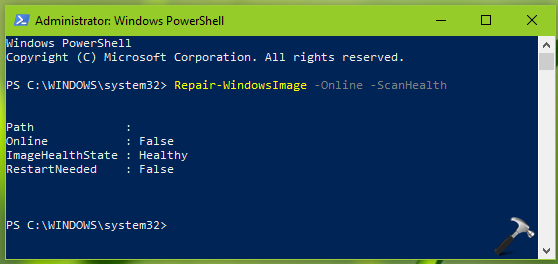
Note: In above results, only if ImageHealthState says False, the Windows image is corrupted and requires to restore as mentioned in next step. If you’re using DISM in Command Prompt, execute Dism /Online /Cleanup-Image /ScanHealth command instead.
3. To repair Windows image corruption, type/paste following and press Enter key:
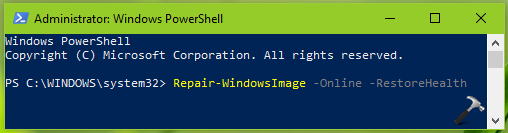
Note: If you’re using DISM in Command Prompt, execute Dism /Online /Cleanup-Image /RestoreHealth command instead.
4. Once you done with command execution, close Windows PowerShell or Command Prompt and reboot.
FIX 2 – Via Registry

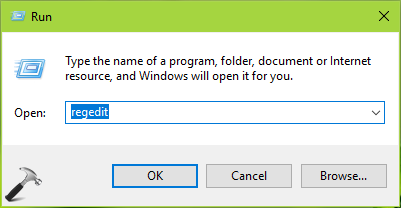
1. Press
+ R and put regedit in Run dialog box to open Registry Editor . Click OK.
2. In left pane of Registry Editor window, navigate to following registry key:
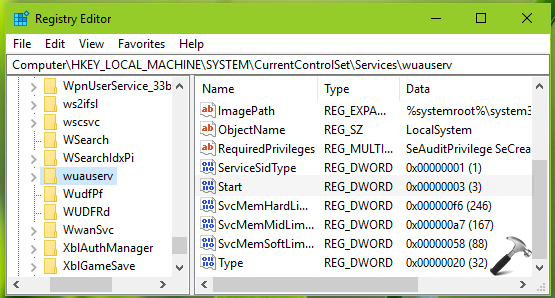
3. Under Services registry key, locate the registry key for service with which you’re facing this issue. The registry key is named with Service name, which you get on service property sheet (double click on service in Services snap-in for this).
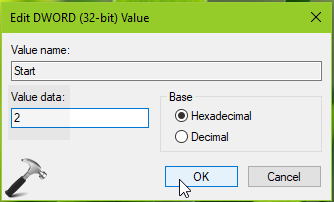
4. Set the Value data to 2 for Automatic, 3 for Manual, 4 for Disabled service Startup type. Click OK. Close Registry Editor and reboot to make changes effective.
So in this way, you can bypass error and change the service to desired state.")
Credits: kapilarya
As we all know, background services drives many Windows features. So it is important that these services should work properly so that dependent features also work as expected.
Recently, while modifying a Windows service status, we received following error:
Above error is shown for Windows Update service but you may receive it with any service. If you’re also facing this issue on your system, please refer below mentioned suggestions and see if they helps you to fix.
FIX 1 – General Suggestions
1. Reboot the machine and see if issue still persists.
2. Perform clean boot.
3. Try the System File Checker (SFC) scan.
4. If SFC scan fails to fix your system, try the DISM tool and see if that helps.
5. If possible, try to restore your system back to date when this issue wasn’t present.
2A. How To Perform Clean Boot In Windows 10/8.1/8/7
1. Press
2. In the System Configuration window, switch to Services tab and check Hide all Microsoft services option. Then click on Disable all.
3. Now switch to Startup tab and click Open Task Manager link.
4. In Task Manager window, on Startup tab, right click a suspected third-party program entry and click Disable.
5. Close Task Manager and reboot the machine.
6. If after reboot, you don’t face the issue, we’ve identified the root cause for your problem, and it is the software for which we disabled service in step 4. You must uninstall the associated software to prevent it from causing trouble on your system.
7. If the issue still persists, enable the software service you disabled in step 4. Pick another service, disable it and reboot, see if the issue is resolved. You can perform this sequence until you identify the actual program causing issue.
3A. How To Use System File Checker To Repair Windows 10/8/7
1. To use SFC /SCANNOW command, you have to open administrative or elevated Command Prompt with administrative privileges. In the Windows search box, type cmd and pick Command Prompt from results, right click it and select Run as administrator.
2. Then simply type SFC /SCANNOW or sfc /scannow command (it’s not case-sensitive) and hit Enter key.
4A. How To Repair Windows 10 Using DISM Command-line Tool
1. Right click Start Button or press
2. First we’ll check if the component store is repairable. This step is optional and if you like, you can skip it and directly go to step 3. So to check component store corruption, type/paste following in administrative Windows PowerShell window and press Enter key:
Code:
Repair-WindowsImage -Online -ScanHealthNote: In above results, only if ImageHealthState says False, the Windows image is corrupted and requires to restore as mentioned in next step. If you’re using DISM in Command Prompt, execute Dism /Online /Cleanup-Image /ScanHealth command instead.
3. To repair Windows image corruption, type/paste following and press Enter key:
Code:
Repair-WindowsImage -Online -RestoreHealthNote: If you’re using DISM in Command Prompt, execute Dism /Online /Cleanup-Image /RestoreHealth command instead.
4. Once you done with command execution, close Windows PowerShell or Command Prompt and reboot.
FIX 2 – Via Registry
1. Press
2. In left pane of Registry Editor window, navigate to following registry key:
Code:
HKEY_LOCAL_MACHINE\SYSTEM\CurrentControlSet\Services3. Under Services registry key, locate the registry key for service with which you’re facing this issue. The registry key is named with Service name, which you get on service property sheet (double click on service in Services snap-in for this).
4. Set the Value data to 2 for Automatic, 3 for Manual, 4 for Disabled service Startup type. Click OK. Close Registry Editor and reboot to make changes effective.
So in this way, you can bypass error and change the service to desired state.
Credits: kapilarya