- Downloaded
- 9.6 GB
- Uploaded
- 6.3 TB
- Ratio
- 679.52
- Seedbonus
- 265,226
- Upload Count
- 191 (191)
Member for 5 years
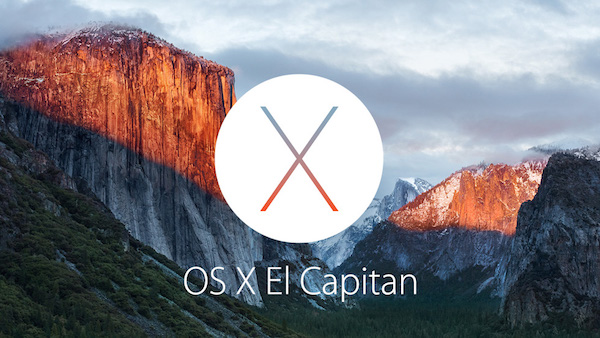
macOS X 10.11 =El Capitan= [macOS]

OS X El Capitan remains available for Mac computers that can't upgrade to macOS Catalina, Mojave, High Sierra, or Sierra, or that need to upgrade to El Capitan first.
macOS X El Capitan version 10.11 is the twelfth major release of OS X. Apple Inc.’s desktop and server operating system for Macintosh. It focuses mainly on performance, stability and security. Following the Northern California landmark-based naming scheme introduced with OS X Mavericks, El Capitan was named after a rock formation in Yosemite National Park, signifying its goal to be a refined version of Yosemite. El Capitan is the final version to be released under the name OS X. El Capitan received far superior reviews when compared to Yosemite.
The first beta of OS X El Capitan was released to developers shortly following the WWDC keynote on June 8, 2015. The first public beta was made available on July 9, 2015. There were multiple betas released after the keynote. OS X El Capitan was released to end users on September 30, 2015, as a free upgrade through the Mac App Store.
Features
OS X El Capitan includes features to improve the security, performance, design and usability of OS X. Compared to OS X Yosemite, Apple says that opening is four times faster, app switching and viewing messages in Mail is twice as fast and launching apps is 40% faster.The maximum amount of memory that could be allocated to the graphics processor has been increased from 1024 MB to 1536 MB on Macs with an Intel HD 4000 GPU. OS X El Capitan supports Metal. Apple's graphics API introduced in iOS 8. to speed up performance in games and professional applications. Apple's typefaceSan Francisco replaces Helvetica Neue as the system typeface. OS X El Capitan also adopts LibreSSL in replacement of OpenSSL used in previous versions.
Window management
OS X El Capitan introduces new window management features such as creating a full-screen split screen limited to two app windows side-by-side in full screen by pressing the green button on left upper corner of the window or Control+Cmd+F keyboard shortcut, then snapping any supported other window to that full screen application. This feature is slightly similar to, although less extensive than, the snap-assist feature in Windows 7 (and later) and several Linux desktop environments, such as GNOME. OS X El Capitan improves Mission Control to incorporate this feature across multiple spaces. It also enables users to spot the pointer more easily by enlarging it by shaking the mouse or swiping a finger back and forth on the trackpad.
System Integrity Protection
OS X El Capitan has a new security feature called System Integrity Protection (SIP, sometimes referred to as "rootless") that protects certain system processes, files and folders from being modified or tampered with by other processes even when executed by the root user or by a user with root privileges (sudo). Apple says that the root user can be a significant risk factor to the system's security, especially on systems with a single user account on which that user is also the administrator. System Integrity Protection is enabled by default, but can be disabled.

You can upgrade to OS X El Capitan from OS X Snow Leopard or later on any of the following Mac models.
Your Mac also needs at least 2GB of memory and 8.8GB of available storage space.
MacBook introduced in 2009 or later, plus MacBook (13-inch, Aluminum, Late 2008)
MacBook Air introduced in late 2008 or later
MacBook Pro introduced in mid 2007 or later
Mac mini introduced in early 2009 or later
iMac introduced in mid 2007 or later
Mac Pro introduced in early 2008 or later
Xserve models introduced in early 2009
To find your Mac model, memory, storage space, and macOS version, choose About This Mac from the Apple menu . If your Mac isn't compatible with OS X El Capitan, the installer will let you know.
Make a backup
Before installing any upgrade, it’s a good idea to back up your Mac. Time Machine makes it simple, or any other way to back up your data.

You must be registered for see links

Install using the 'createinstallmedia' command in Terminal:
1- After downloading, unzip to get the installer file and place it into the application folder, connect the USB flash drive or other volume you're using for the bootable installer. Make sure that it has at least 15GB of available storage and is formatted as Mac OS Extended.
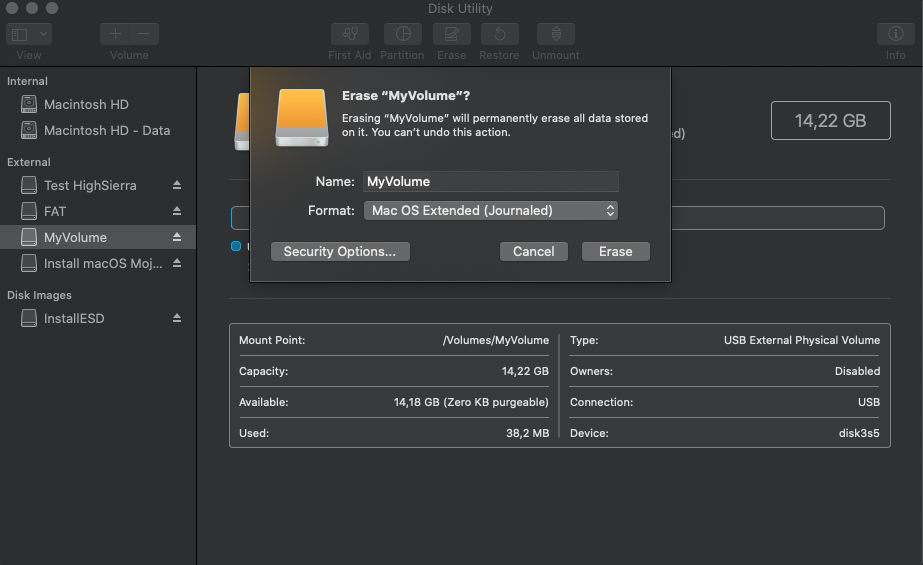
2- Open Terminal, which is in the Utilities folder of your Applications folder.
3- Type or paste the following command in Terminal. These assume that the installer is still in your Applications folder, and MyVolume is the name of the USB flash drive or other volume you're using. If it has a different name, replace MyVolume in these commands with the name of your volume.
sudo /Applications/Install\ OS\ X\ El\ Capitan.app/Contents/Resources/createinstallmedia --volume /Volumes/MyVolume --applicationpath /Applications/Install\ OS\ X\ El\ Capitan.app
4- Press Return after typing the command.
5- When prompted, type your administrator password and press Return again. Terminal doesn't show any characters as you type your password.
6- When prompted, type Y to confirm that you want to erase the volume, then press Return. Terminal shows the progress as the bootable installer is created.
7- When Terminal says that it's done, the volume will have the same name as the installer you downloaded, such as Install macOS El Capitan. You can now quit Terminal and eject the volume.
Use the bootable installer
1. Plug the bootable installer into a compatible Mac.
2. Use Startup Manager or Startup Disk preferences to select the bootable installer as the startup disk, then start up from it. Your Mac will start up to macOS Recovery.
3. Choose your language, if prompted.
4. A bootable installer doesn't download macOS from the Internet, but it does require the Internet to get information specific to your Mac model, such as firmware updates. If you need to connect to a Wi-Fi network, use the Wi-Fi menu  in the menu bar.
5. Select Install macOS (or Install OS X) from the Utilities window, then click Continue and follow the onscreen instructions.

Scanned with Bitdefender Antivirus 4.1.2.18 macOS
You must be registered for see links
You must be registered for see links

-
 macOS X 10.11 =El Capitan=[macOS]=TeamOS=.torrent
- (58.3 KB, 1,416, Size: 5.8 GB, Seeders: 2, Leechers: 0, Completed: 1,864)
-
-
Created With:uTorrent/1870
-
Comment:Downloaded From https://www.teamos-hkrg.com/
-
Peers:2 Seeders + 0 Leechers = 2 Peers
-
Last Announced
-
Info Hash:c2612e6688fa6ea3134ba25e694d58c22d5433f2
-
- Loading…
")
