- Downloaded
- 774.5 GB
- Uploaded
- 7.8 TB
- Ratio
- 10.32
- Seedbonus
- 7
- Upload Count
- 0 (0)
Member for 5 years
The $WINDOWS.~BT and $WINDOWS.~WS folders are located at the root of the system drive, which is usually “C” drive. These folders are hidden by default. You need to configure the File Explorer to see them.
The $WINDOWS.~BT and $WINDOWS.~WS folders are created on your Windows 10 PC when you upgraded your Windows 10 installation to the latest version. For instance, these folders get created when you upgrade from Windows 10 October 2018 Update to Windows 10 May 2019 Update.
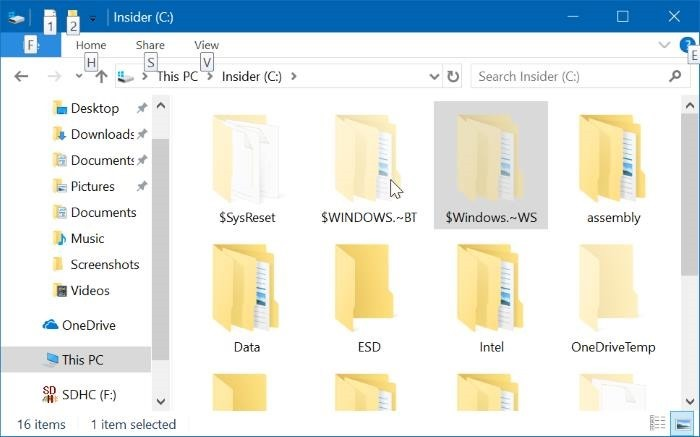
The $WINDOWS.~BT folder contains files from the previous version of Windows 10 which are required to go back to the previous version. Installation files used by Windows setup or Media Creation Tool are saved in $Windows.~WS folder.
If your system drive is running out of free space, you can free up some good amount of space by deleting these folders. But how to safely delete $WINDOWS.~BT and $WINDOWS.~WS folders in Windows 10?
Since $WINDOWS.~BT and $WINDOWS.~WS folders are system folders and contain crucial files, many people wonder if it’s safe to delete these folders. The answer is, you can safely delete these folders only if you don’t want to go back to previous Windows installation or version. That is, once you delete these folders, you cannot go back to the previous version of Windows 10.
If you are happy with the current version of Windows 10, you can delete them free up drive space. You will need to use the built-in Disk Cleanup tool to delete $WINDOWS.~BT and $WINDOWS.~WS folders safely. Here is how to do just that.
Important: You won’t be able to go back to previous Windows installation after deleting these folders.
Delete $WINDOWS.~BT and $WINDOWS.~WS folders
Step 1: Open up This PC. Right-click on the drive where Windows 10 is installed and then click Properties to open the properties dialog.
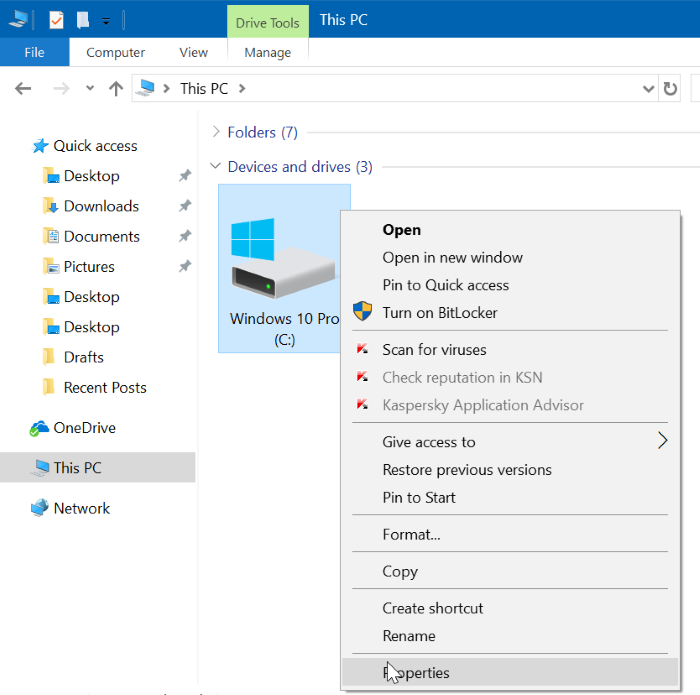
Step 2: Under the General tab, click the Disk Cleanup button. This will open the Disk Cleanup tool.

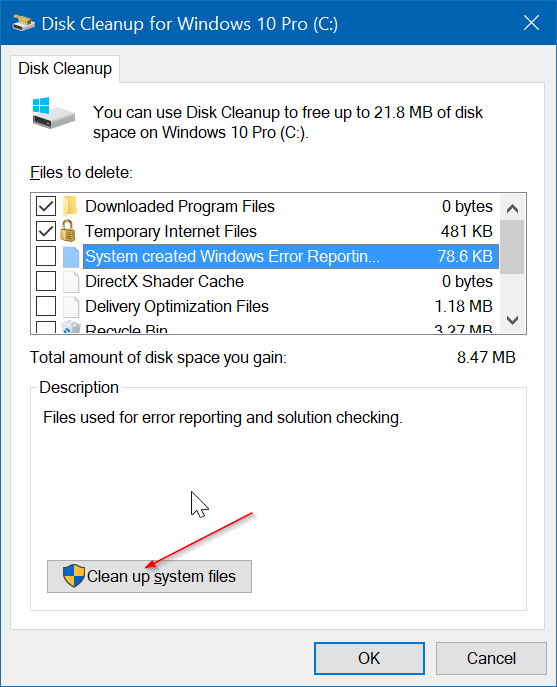
Step 3: When you see the following dialog of Disk Cleanup, click Clean up system files button.
Step 4: Finally, select Previous Windows installation(s) and Temporary Windows installation files. Click Ok button.
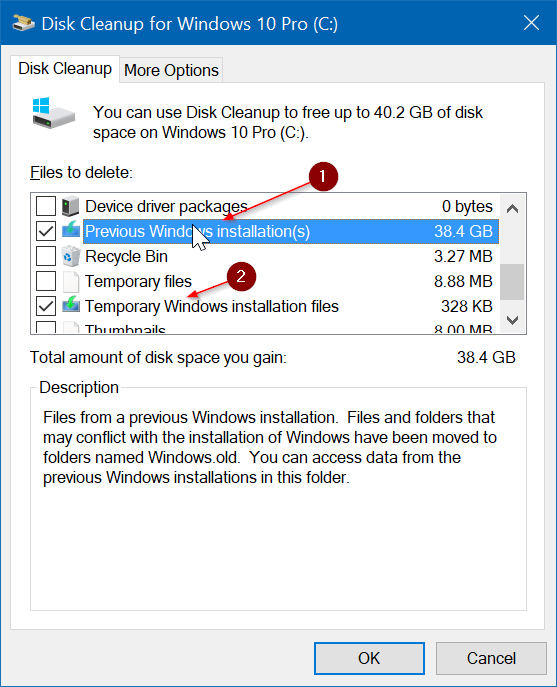
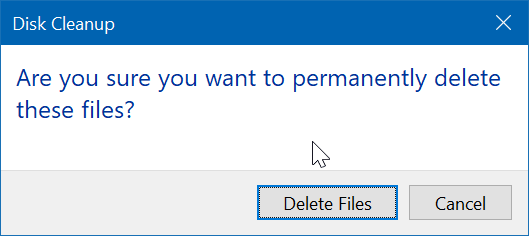
When you see the confirmation dialog, click Delete Files button. The Disk Cleanup tool will now delete $WINDOWS.~BT and $WINDOWS.~WS folders, and all files in these folders.
It’s worth noting that selecting Previous Windows installation(s) deletes $Windows.~BT and Windows.old folders. Similarly, select Temporary Windows installation files option to delete $Windows.~WS folder. Select both options to delete $WINDOWS.~BT and $WINDOWS.~WS folders.
Remember that Windows 10 will automatically create these folders again next time when you upgrade Windows 10 to the newest version. Repeat these steps again to delete them.
The $WINDOWS.~BT and $WINDOWS.~WS folders are created on your Windows 10 PC when you upgraded your Windows 10 installation to the latest version. For instance, these folders get created when you upgrade from Windows 10 October 2018 Update to Windows 10 May 2019 Update.
The $WINDOWS.~BT folder contains files from the previous version of Windows 10 which are required to go back to the previous version. Installation files used by Windows setup or Media Creation Tool are saved in $Windows.~WS folder.
If your system drive is running out of free space, you can free up some good amount of space by deleting these folders. But how to safely delete $WINDOWS.~BT and $WINDOWS.~WS folders in Windows 10?
Since $WINDOWS.~BT and $WINDOWS.~WS folders are system folders and contain crucial files, many people wonder if it’s safe to delete these folders. The answer is, you can safely delete these folders only if you don’t want to go back to previous Windows installation or version. That is, once you delete these folders, you cannot go back to the previous version of Windows 10.
If you are happy with the current version of Windows 10, you can delete them free up drive space. You will need to use the built-in Disk Cleanup tool to delete $WINDOWS.~BT and $WINDOWS.~WS folders safely. Here is how to do just that.
Important: You won’t be able to go back to previous Windows installation after deleting these folders.
Delete $WINDOWS.~BT and $WINDOWS.~WS folders
Step 1: Open up This PC. Right-click on the drive where Windows 10 is installed and then click Properties to open the properties dialog.
Step 2: Under the General tab, click the Disk Cleanup button. This will open the Disk Cleanup tool.
Step 3: When you see the following dialog of Disk Cleanup, click Clean up system files button.
Step 4: Finally, select Previous Windows installation(s) and Temporary Windows installation files. Click Ok button.
When you see the confirmation dialog, click Delete Files button. The Disk Cleanup tool will now delete $WINDOWS.~BT and $WINDOWS.~WS folders, and all files in these folders.
It’s worth noting that selecting Previous Windows installation(s) deletes $Windows.~BT and Windows.old folders. Similarly, select Temporary Windows installation files option to delete $Windows.~WS folder. Select both options to delete $WINDOWS.~BT and $WINDOWS.~WS folders.
Remember that Windows 10 will automatically create these folders again next time when you upgrade Windows 10 to the newest version. Repeat these steps again to delete them.