- Downloaded
- 774.5 GB
- Uploaded
- 7.8 TB
- Ratio
- 10.32
- Seedbonus
- 7
- Upload Count
- 0 (0)
Member for 5 years
Windows 10 and earlier versions come with a built-in utility called Windows Memory Diagnostics Tool to check for memory problems. In this guide, we will see how to run and use Windows Memory Diagnostics Tool on a Windows 10 PC.

Using the Memory Diagnostics tool in Windows 10
The Memory Diagnostics tool in Windows 10 offers three types of tests: Basic, Standard, Extended. By default, the utility runs standard test which is sufficient in most cases to detect memory problems.
The “Basic” test does MATS+, INVC, and SCHCKR.
In the “Standard” mode, it does all the “Basic” tests, plus LRAND, Stride6 (cache enabled), CHCKR3, WMATS+, and WINVC.
The “Extended” test includes all the tests in “Standard” test plus MATS+, Stride38, WSCHCKR, WStride-6, CHCKR4, WCHCKR3, ERAND, Stride6, and CHCKR8.
When the utility is running, you can click the F1 key to see advanced options where you can select a test type. The “Standard” test takes about 30 minutes. The “Extended” test might take a few hours to complete.
Once Memory Diagnostics Tool completes checking the memory for errors, your PC will automatically restart, and you will be able to see the test results after you log on. If no issues found, you will get “No memory errors were detected” notification.
Method 1 of 3
Run Memory Diagnostics utility on a bootable PC
This is the ideal method when your PC is bootable, and you want to identify and diagnose problems with your PC’s memory.
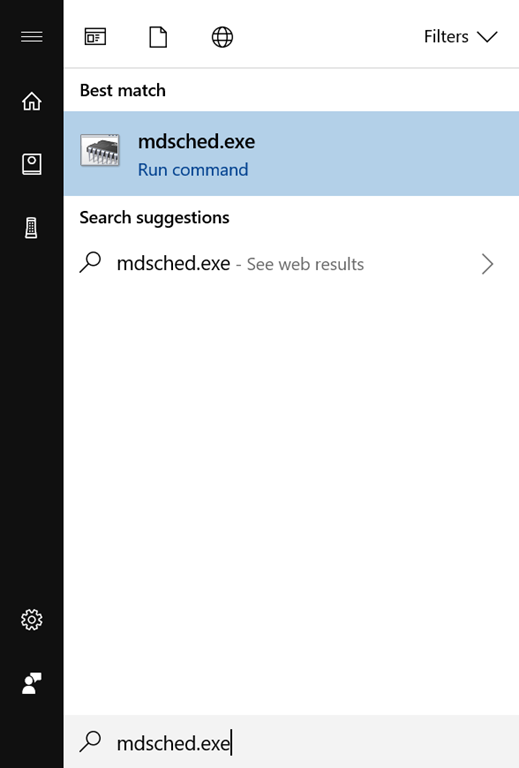
Step 1: In the Start/taskbar search field, type mdsched.exe or Windows Memory Diagnostics and then press the Enter key.
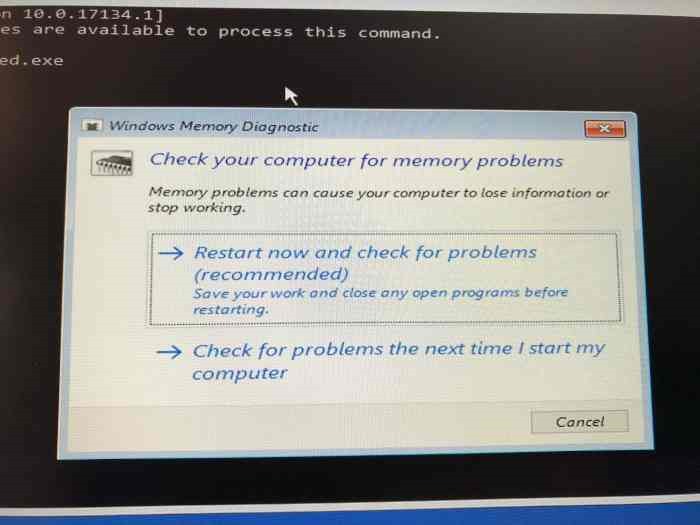
Step 2: When you see the following Memory Diagnostic dialog on your screen, save your work, close all running programs, and then click Restart now and check for problems option.
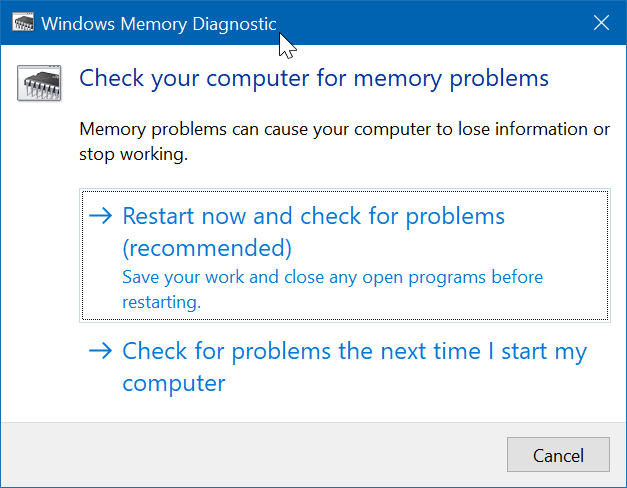
lternatively, if you don’t want to restart now, click Check for problems the next time I start my computer option.
Step 3: The Memory Diagnostics Tool will automatically run upon rebooting your PC to check for memory problems.
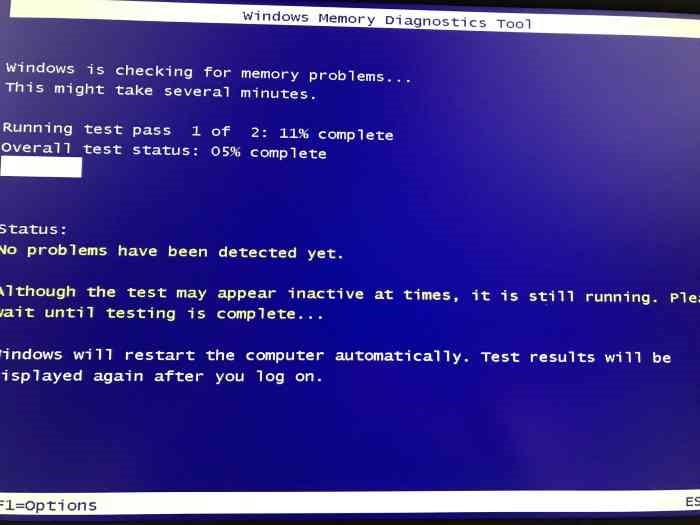
When the Memory Diagnostics utility is running, you will be able to see the status, including if the tool has detected any memory problems.
If issues found, you will get details upon logging in to your account.
Method 2 of 3
Run Memory Diagnostics Tool without booting into Windows 10
If your Windows 10 PC is not bootable for some reason, you can run the Memory Diagnostics Tool even without booting into Windows 10. Here is how to do that.
Step 1: Turn on your PC and navigate to Advanced options.
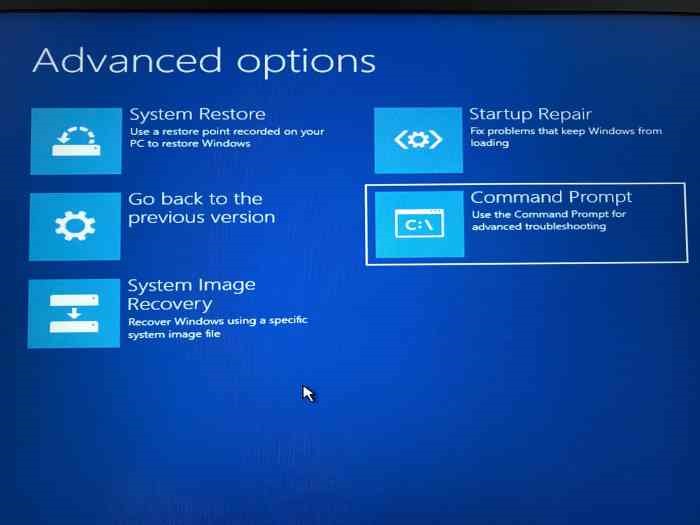
Step 2: On the Advanced boot options screen, click Command Prompt tile. Your PC will restart now.
Step 3: If you are asked to enter your user account’s password, please do the same. If you have two or more accounts, you will need to select your account and then enter the password for the same.
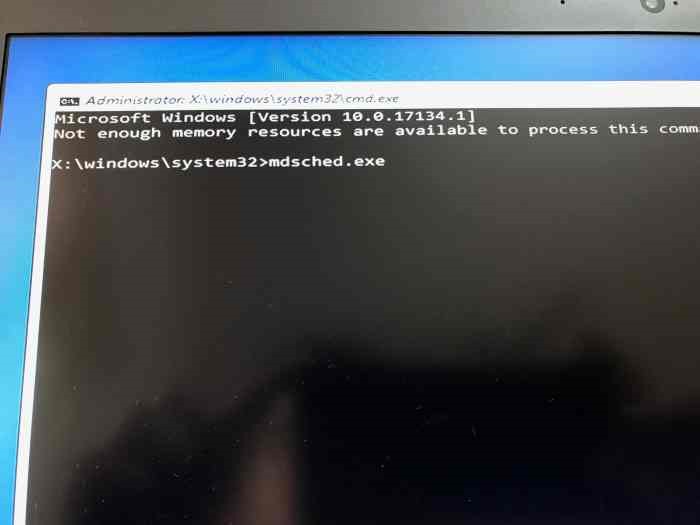
Step 4: You should now see the Command Prompt window. Type mdsched.exe and press Enter key.
Step 5: Click Restart now and check for problems option to restart your PC and check for memory errors.
Refer to the directions in Using Memory Diagnostics Tool in Windows 10 section of this guide (screen up to see) to know how to use the Memory Diagnostics Tool.
Method 3 of 3
Run Memory Diagnostic tool from Windows 10 recovery media
You can use the Windows 10 recovery drive to start the Windows Memory Diagnostics Tool. Here is how to do that.
Step 1: If you don’t have the recovery drive.
Step 2: Configure your PC’s BIOS to boot from USB/DVD. Restart your PC and then boot from the recovery drive.
Step 3: When you get keyboard layout screen, choose your keyboard layout.
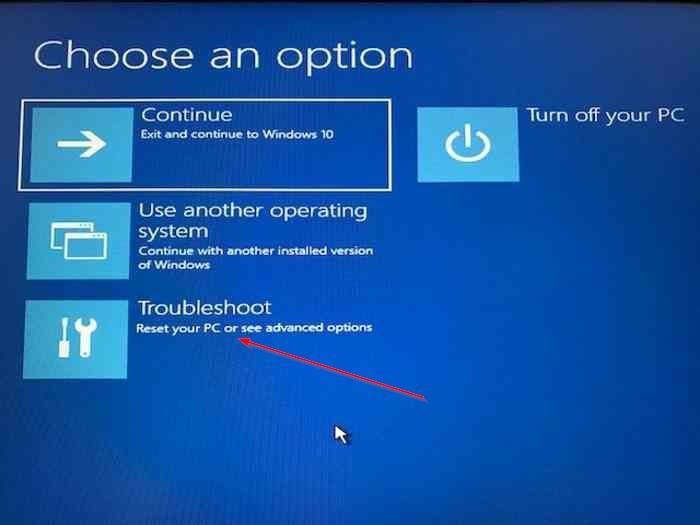
Step 4: On the Choose an option screen, click on Troubleshoot tile.
Step 5: On the Advanced options screen, click Command Prompt tile to open the same. The Command Prompt window should immediately appear on your screen.

Step 6: In the Command Prompt, type mdsched.exe and then hit Enter key.
Step 7: When you see the following prompt, click “Restart now and check for problems” option to reboot your PC and run the Memory Diagnostics utility.
Using the Memory Diagnostics tool in Windows 10
The Memory Diagnostics tool in Windows 10 offers three types of tests: Basic, Standard, Extended. By default, the utility runs standard test which is sufficient in most cases to detect memory problems.
The “Basic” test does MATS+, INVC, and SCHCKR.
In the “Standard” mode, it does all the “Basic” tests, plus LRAND, Stride6 (cache enabled), CHCKR3, WMATS+, and WINVC.
The “Extended” test includes all the tests in “Standard” test plus MATS+, Stride38, WSCHCKR, WStride-6, CHCKR4, WCHCKR3, ERAND, Stride6, and CHCKR8.
When the utility is running, you can click the F1 key to see advanced options where you can select a test type. The “Standard” test takes about 30 minutes. The “Extended” test might take a few hours to complete.
Once Memory Diagnostics Tool completes checking the memory for errors, your PC will automatically restart, and you will be able to see the test results after you log on. If no issues found, you will get “No memory errors were detected” notification.
Method 1 of 3
Run Memory Diagnostics utility on a bootable PC
This is the ideal method when your PC is bootable, and you want to identify and diagnose problems with your PC’s memory.
Step 1: In the Start/taskbar search field, type mdsched.exe or Windows Memory Diagnostics and then press the Enter key.
Step 2: When you see the following Memory Diagnostic dialog on your screen, save your work, close all running programs, and then click Restart now and check for problems option.
lternatively, if you don’t want to restart now, click Check for problems the next time I start my computer option.
Step 3: The Memory Diagnostics Tool will automatically run upon rebooting your PC to check for memory problems.
When the Memory Diagnostics utility is running, you will be able to see the status, including if the tool has detected any memory problems.
If issues found, you will get details upon logging in to your account.
Method 2 of 3
Run Memory Diagnostics Tool without booting into Windows 10
If your Windows 10 PC is not bootable for some reason, you can run the Memory Diagnostics Tool even without booting into Windows 10. Here is how to do that.
Step 1: Turn on your PC and navigate to Advanced options.
Step 2: On the Advanced boot options screen, click Command Prompt tile. Your PC will restart now.
Step 3: If you are asked to enter your user account’s password, please do the same. If you have two or more accounts, you will need to select your account and then enter the password for the same.
Step 4: You should now see the Command Prompt window. Type mdsched.exe and press Enter key.
Step 5: Click Restart now and check for problems option to restart your PC and check for memory errors.
Refer to the directions in Using Memory Diagnostics Tool in Windows 10 section of this guide (screen up to see) to know how to use the Memory Diagnostics Tool.
Method 3 of 3
Run Memory Diagnostic tool from Windows 10 recovery media
You can use the Windows 10 recovery drive to start the Windows Memory Diagnostics Tool. Here is how to do that.
Step 1: If you don’t have the recovery drive.
Step 2: Configure your PC’s BIOS to boot from USB/DVD. Restart your PC and then boot from the recovery drive.
Step 3: When you get keyboard layout screen, choose your keyboard layout.
Step 4: On the Choose an option screen, click on Troubleshoot tile.
Step 5: On the Advanced options screen, click Command Prompt tile to open the same. The Command Prompt window should immediately appear on your screen.
Step 6: In the Command Prompt, type mdsched.exe and then hit Enter key.
Step 7: When you see the following prompt, click “Restart now and check for problems” option to reboot your PC and run the Memory Diagnostics utility.
")

