- Downloaded
- 774.5 GB
- Uploaded
- 7.8 TB
- Ratio
- 10.32
- Seedbonus
- 7
- Upload Count
- 0 (0)
Member for 5 years
When using a Microsoft account to sign-in, Windows 10 automatically uses your Microsoft account picture as user account picture on your PC. However, while using a local user account, you need to either use one of the default user account pictures or set your own.
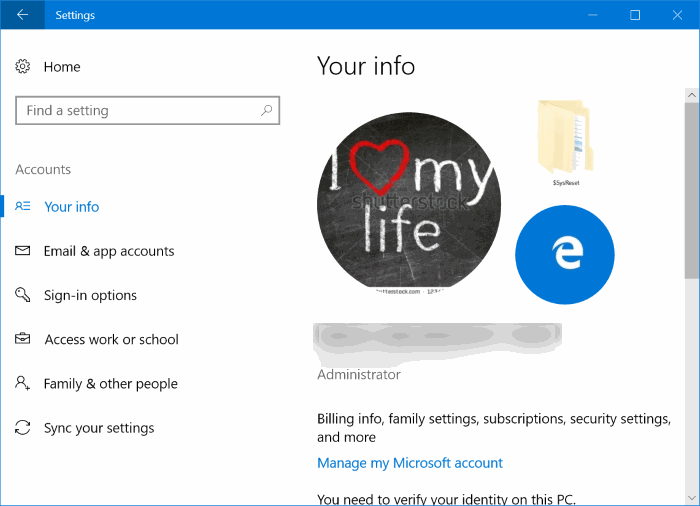
As you might have observed by now, when you change a user picture by navigating to Settings > User accounts > Your Info, the page displays up to two old user account pictures on the same page. Windows 10 doesn’t automatically delete your previously used user account pictures, and all old user account pictures are saved in the system drive.
The feature is quite helpful as you can quickly set one of the previously set user pictures as your new user account picture.
Now, for some reason, you might want to get rid of old user account pictures from the page. You cannot simply right-click on these pictures and delete or remove them. Luckily, there is an easy way to remove old user account pictures in Windows 10.
Delete old user account pictures
Complete the given below directions to remove or delete old user account pictures from Windows 10.
Step 1: Open up the File Explorer and navigate to the following location:
C:\Users\YourUserName\AppData\Roaming\ Microsoft\Windows\AccountPictures
In the above path, “C” is the drive where Windows 10 is installed.
Step 2: Here, you can see all your old account pictures. Delete pictures that you want to remove. That’s it!
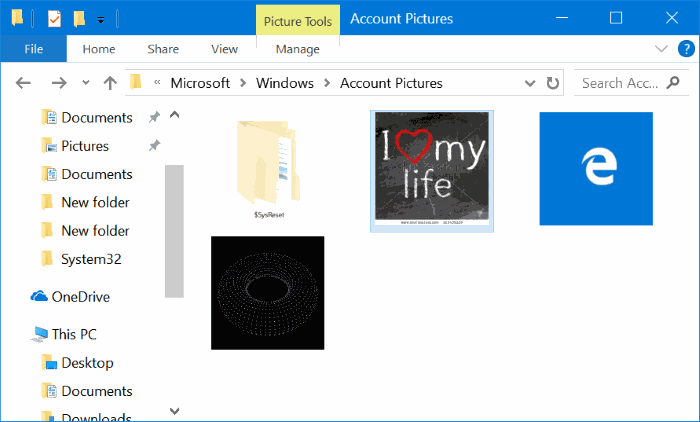
While deleting old account pictures, be sure to keep your current account picture!
Use default account picture
If you want to use one of the user account pictures bundled with Windows 10, you can do so by following the given below directions.
Step 1: Open the Settings app. Click User Account and then click Your Info.
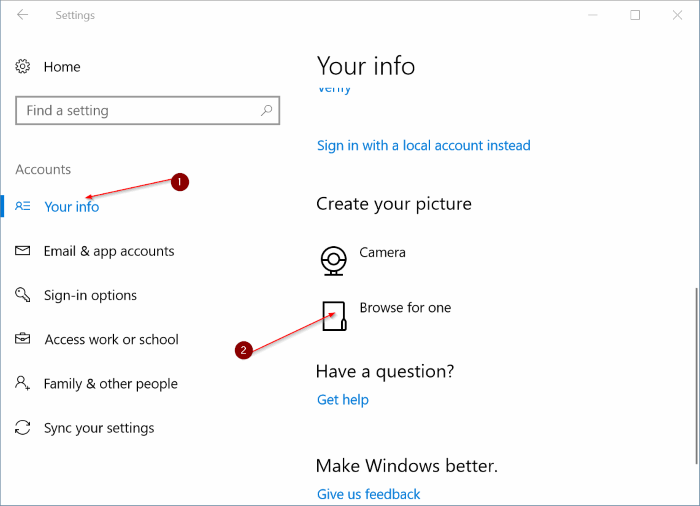
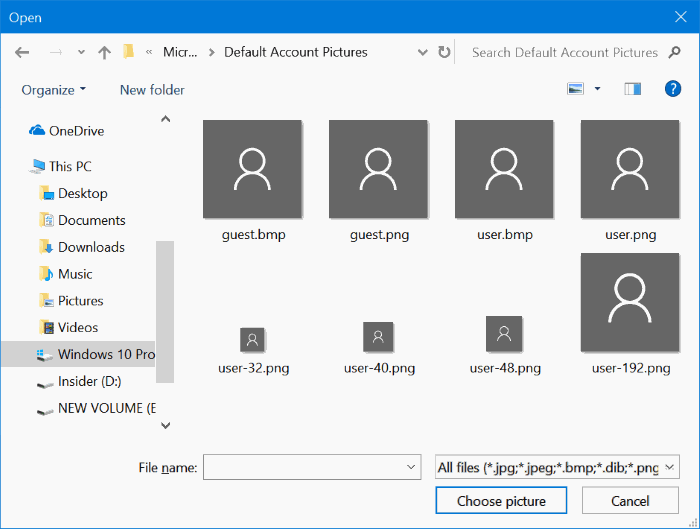
Step 2: In the Create your picture section, click Browse for one option and then browse to the following location:
C:\ProgramData\Microsoft\User Account Pictures
Or
C:\ProgramData\Microsoft\Default Account Pictures
Where “C” is your Windows 10 installation drive.

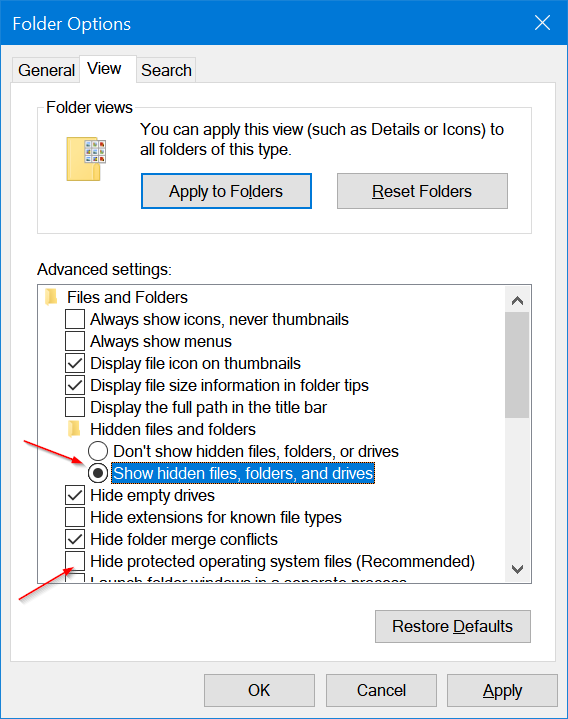
MPORTANT: ProgramData is a hidden file. To see that, open Folder Options, switch to View tab, uncheck Hide protected operating system files, and select Show hidden files, folders, and drives options.
Step 3: Select one of the user account pictures and then click the Open button. Simple as that!
As you might have observed by now, when you change a user picture by navigating to Settings > User accounts > Your Info, the page displays up to two old user account pictures on the same page. Windows 10 doesn’t automatically delete your previously used user account pictures, and all old user account pictures are saved in the system drive.
The feature is quite helpful as you can quickly set one of the previously set user pictures as your new user account picture.
Now, for some reason, you might want to get rid of old user account pictures from the page. You cannot simply right-click on these pictures and delete or remove them. Luckily, there is an easy way to remove old user account pictures in Windows 10.
Delete old user account pictures
Complete the given below directions to remove or delete old user account pictures from Windows 10.
Step 1: Open up the File Explorer and navigate to the following location:
C:\Users\YourUserName\AppData\Roaming\ Microsoft\Windows\AccountPictures
In the above path, “C” is the drive where Windows 10 is installed.
Step 2: Here, you can see all your old account pictures. Delete pictures that you want to remove. That’s it!
While deleting old account pictures, be sure to keep your current account picture!
Use default account picture
If you want to use one of the user account pictures bundled with Windows 10, you can do so by following the given below directions.
Step 1: Open the Settings app. Click User Account and then click Your Info.
Step 2: In the Create your picture section, click Browse for one option and then browse to the following location:
C:\ProgramData\Microsoft\User Account Pictures
Or
C:\ProgramData\Microsoft\Default Account Pictures
Where “C” is your Windows 10 installation drive.
MPORTANT: ProgramData is a hidden file. To see that, open Folder Options, switch to View tab, uncheck Hide protected operating system files, and select Show hidden files, folders, and drives options.
Step 3: Select one of the user account pictures and then click the Open button. Simple as that!